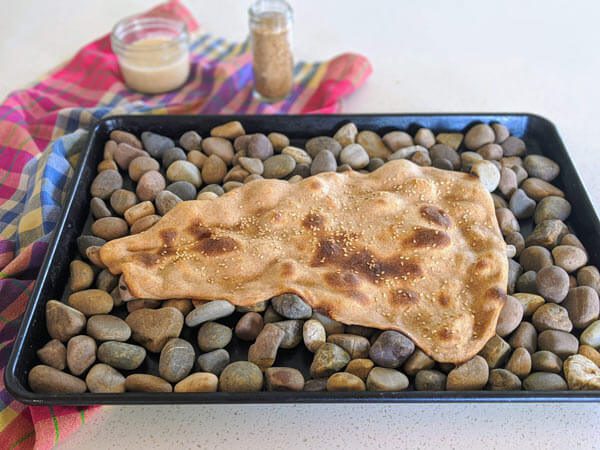
Naan Sangak is one of the hallmarks of Persian culture and cuisine that dates back to the Pre-Islamic era in Iran. In the Yearbook of the Baker’s Committee in Tehran that was published in 1947, the following is written about the history of Naan Sangak: “Shah Abbas, the Emperor of the Safavid dynasty, to meet the needs of the people who came from the lower class and his troops who needed bread to feed themselves while traveling, decided to come up with a solution. To feed his troops, in every city they visited they needed to order so much bread that would suffice for the entire army. To solve this problem, Sheikh Bahayi, Arab-Iranian Shia Islamic scholar, philosopher, architect, mathematician, astronomer, and poet who lived in the late 16th and early 17th centuries in Safavid Iran, invented the Sangak oven.” The term “Sangak,” which means “pebbles,” refers to a type of bread cooked on pebbles in the oven. The term Sangak was even mentioned in Burhan-i Qati, a Persian dictionary compiled during the 17th century by Muhammad Husayn bin Khalaf Tabrizi, to refer to “a type of bread cooked on hot pebbles.”
Making Nan Sangak is easy, and the results are worth the effort. In the following, we will provide the step-by-step recipe for Naan Sangak that everyone can use and enjoy making Naan Sangak at home.
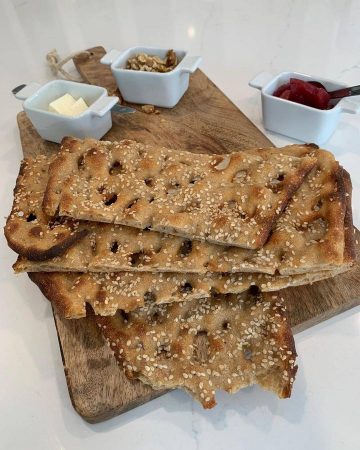
Sanagk Bread Ingredients
- Active dry yeast: ½ teaspoons
- Sangak flour: 2 cups
- warm water: 2 cups
- Salt: as much as needed
- Sesame: as much as needed
- Butter: as much as needed
Naan Sangak recipe
- The first step in making the Sangak bread is making the dough. You have to make the dough at least 24 hours before making the bread because the dough has to rest for the yeast to activate.
Note1: If the dough does not rest enough, the yeast will not get activated, and you will end up with bread that does not have the proper texture and, at times, may not even be edible.
- To make the dough, get a large bowl. Add 1/3 of the Sangak flour to the bowl and add active dry yeast. Then add 1 cup of warm water to the mixture and start mixing. Once you have mixed them properly, cover the bowl with plastic bags carefully, and let it rest for 24 hours in the fridge.
Note2: The water you add to the yeast and Sangak flour mixture should not be so hot that it burns your fingers and should not be so cold. It should be warm enough to activate the dry yeast.
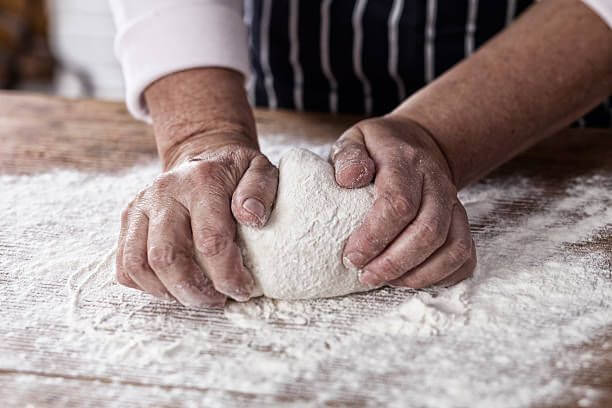
- After resting for 24 hours in the fridge, take the dough out. Add the remaining Sangak flour to some water and salt, and start stirring till you end up with a soft mixture. Now add the mixture to the dough and start working on the dough with your hands. The more you knead the dough, the better the final texture of the bread. Once you feel like the dough has reached the right consistency, stop kneading it and leave the dough in the fridge to rest for at least 2 hours.
- It is now time to make the proper oven for cooking Sangak bread. Take a baking tray and put some pebbles in it and leave the tray in the hot oven long enough for the pebbles to get hot.
- Now take out the dough from the fridge. Take some of it, place it on a breadboard, and start flattening it with your hands. Use your fingertips to leave some marks on the bread.
Note3: Make sure to leave a water bowl next to you before working on the dough because it is sticky, and you need to wet your hands first; otherwise, it will stick to your fingers.
Note4: Normally, the Sangak bread dough is sticky and slightly wet. If you end up with sticky dough yourself, do not worry! Your dough has the right consistency.
Note5: Before taking the dough out of the fridge and start preparing the bread, make sure you have a wide enough surface for your bread to flatten it out and start working on it before putting it in the oven. Having the perfect space to work in is one of the most important factors in baking bread.
- Now remove the tray from the oven carefully because the pebbles are so hot. Use a brush and place some butter on the pebbles so that the dough would not stick to the pebbles and could be removed easily. Place the flattened-out dough on the pebbles carefully, spread as much sesame as you please on the dough, and put the tray back in the oven.
- Leave the tray in the oven until the sides of the bread turn golden, then remove the tray from the oven and turn the dough upside down so that the other side of the bread will get cooked perfectly.
- Once your bread gets a golden color on the surface, it is ready. You can now remove the tray from the oven and let it cool down. Once the bread is cooled down, you can remove the pebbles and enjoy your homemade Sangak Naan.
You can eat Sangak bread as a part of Persian breakfast or alongside foods like Kotlet or Abgoosht.
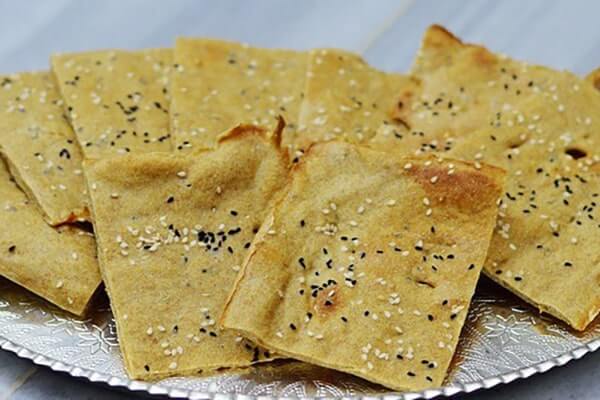
The recipe above provides a step-by-step guide to baking Sangak Bread or Naan Sangak. Do not forget to make this recipe and share it with us. If you also have any questions about this recipe, please do not hesitate to ask.
FAQs About Sangak Bread
- Can you use any other types of flour in Naan Sangak?
No, you can’t. If you would like to reach the right consistency and texture for your bread, you must use Sangak flour which is specifically designed for making Sangak bread. Sangak flour contains a large quantity of wheat bran which gives it a brownish color but contains lots of minerals that make it the perfect choice for making Sangak bread.
- Can anyone bake Saangak bread?
Yes, baking Sangak bread is easy, and if you follow the step-by-step recipe above, you can bake perfect bread even if you have not cooked any bread before.
- Do you have to make the dough beforehand? What about buying ready-to-cook dough?
If making the dough is too hard for you, you can buy it. Some bakeries even provide their customers with ready-to-cook Sangak dough.

